An oft-mentioned shortcoming of the Gaggia Classic is the crappy steam knob. It’s not ergonomic, can break, and is just not that good looking:
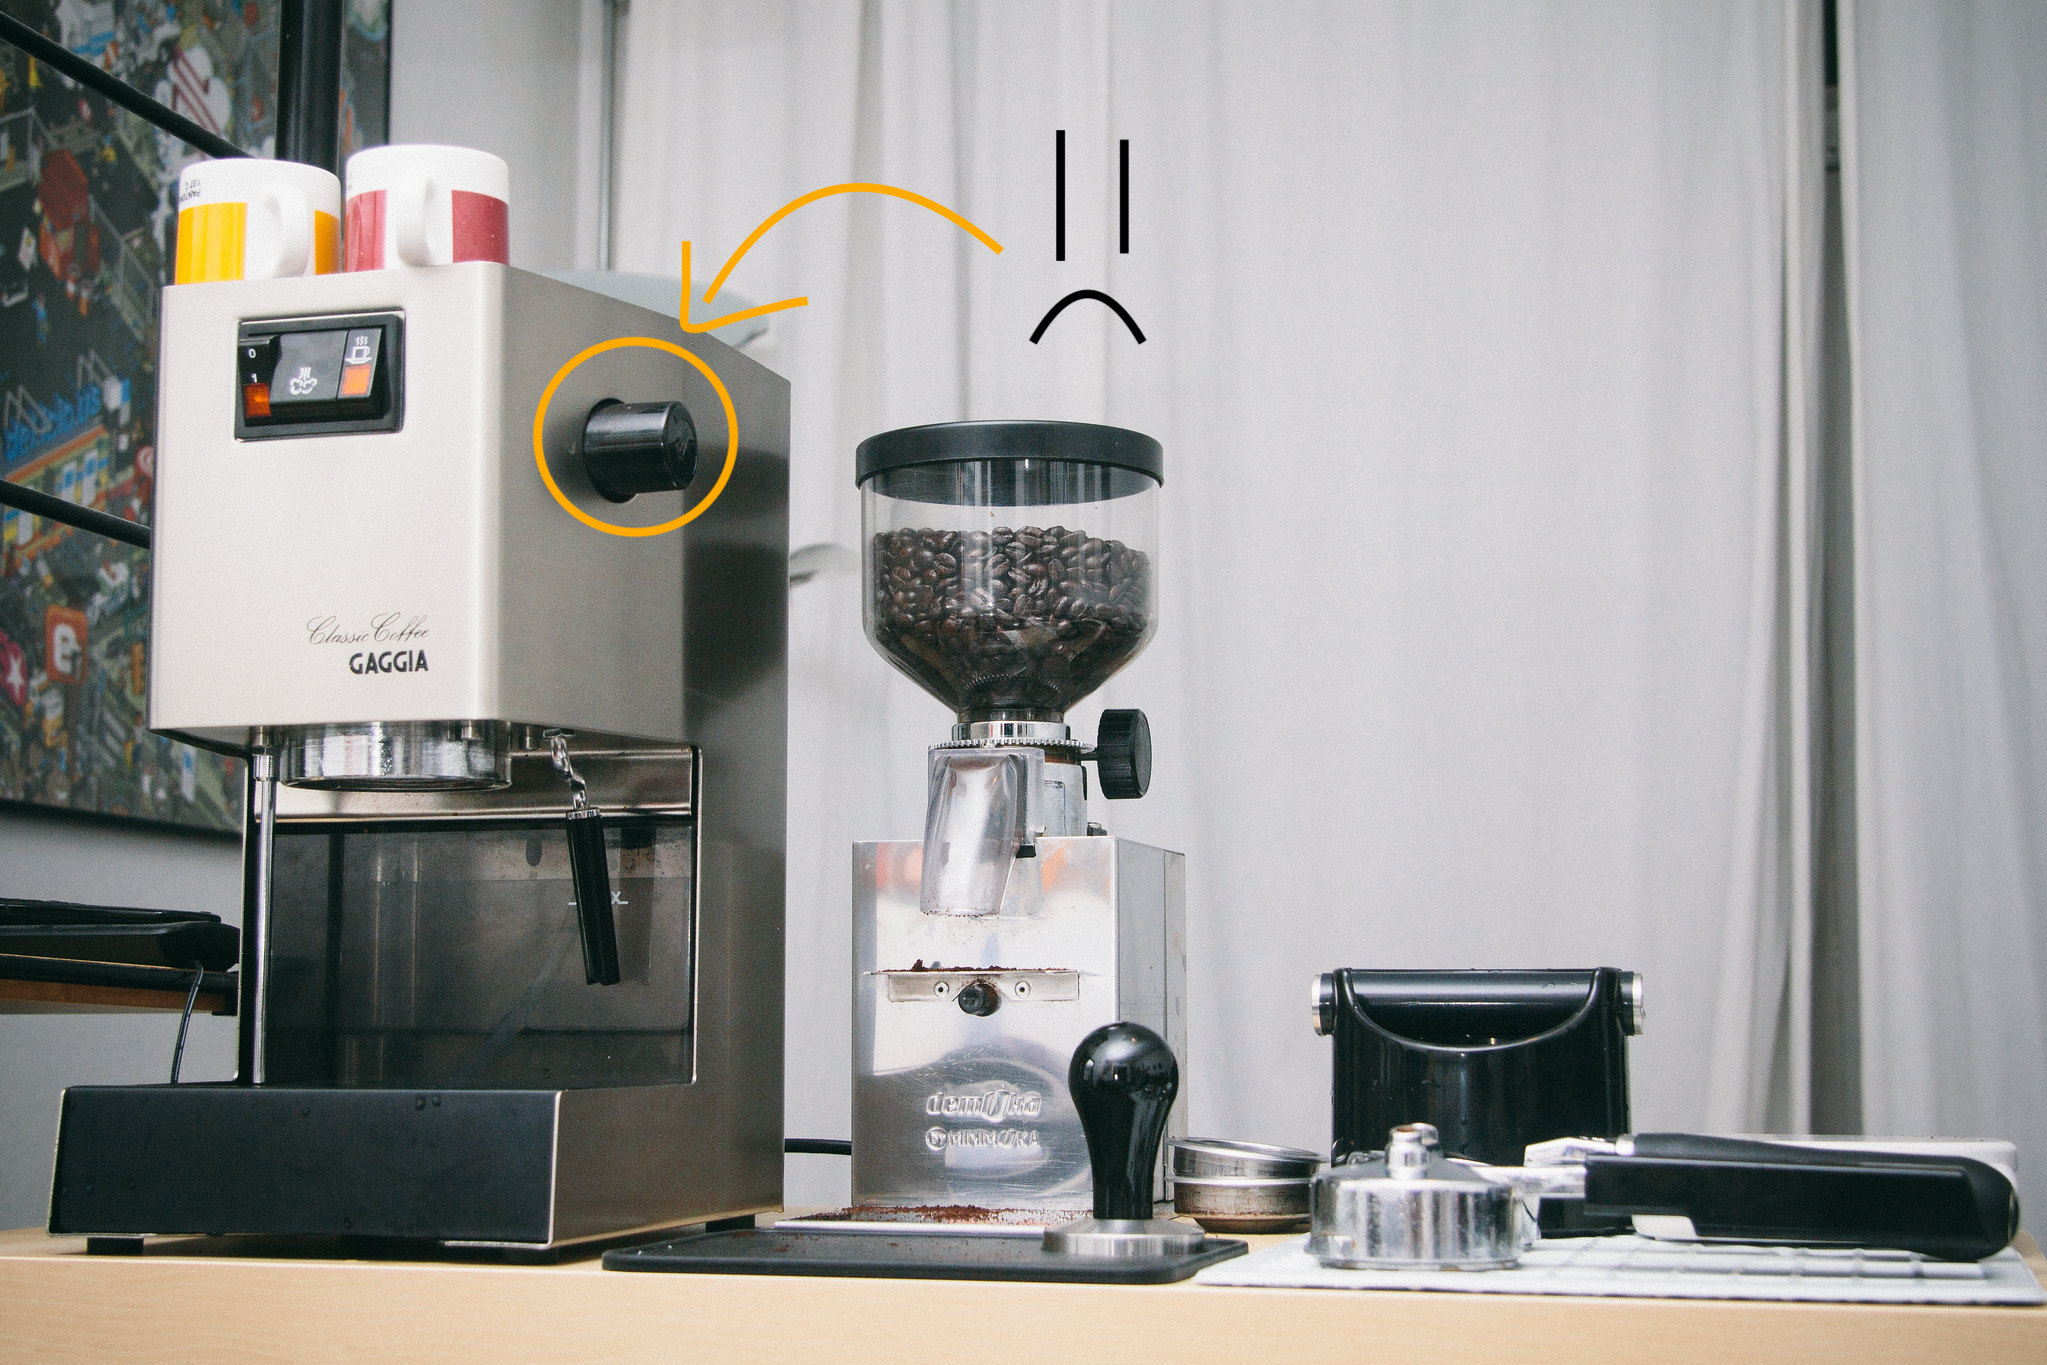
I was working on my 2014 Gaggia Classic last week and cracked the knob trying to remove it. Instead of paying 20 bucks for a equally-crappy replacement, I decided I wanted to try and build a replacement. There are a few mods floating around out there, but they either don’t appeal to my aesthetics, or there are no instructions on replicating what they’ve done.
After looking at Gaggia parts diagrams, making some (somewhat) careful measurements, and spending more time browsing McMaster-Carr and many other similar parts sites than I care to admit, I came up with a solution that I thought would work. Specifically, I wanted to figure out something that would meet the following requirements:
- most importantly: fits snugly on the 4.6x6mm D-shaft that turns the steam valve
- looks better than the stock knob
- is grippier than the stock knob
- is larger than the stock knob
- has enough clearance from the chassis of the Gaggia so that it isn’t annoying to turn
- is wide enough to fill most of the hole in the side of the chassis
- at least semi-heat insulated; the brass steam valve gets hot!
- uses off the shelf parts or is otherwise not crazy expensive
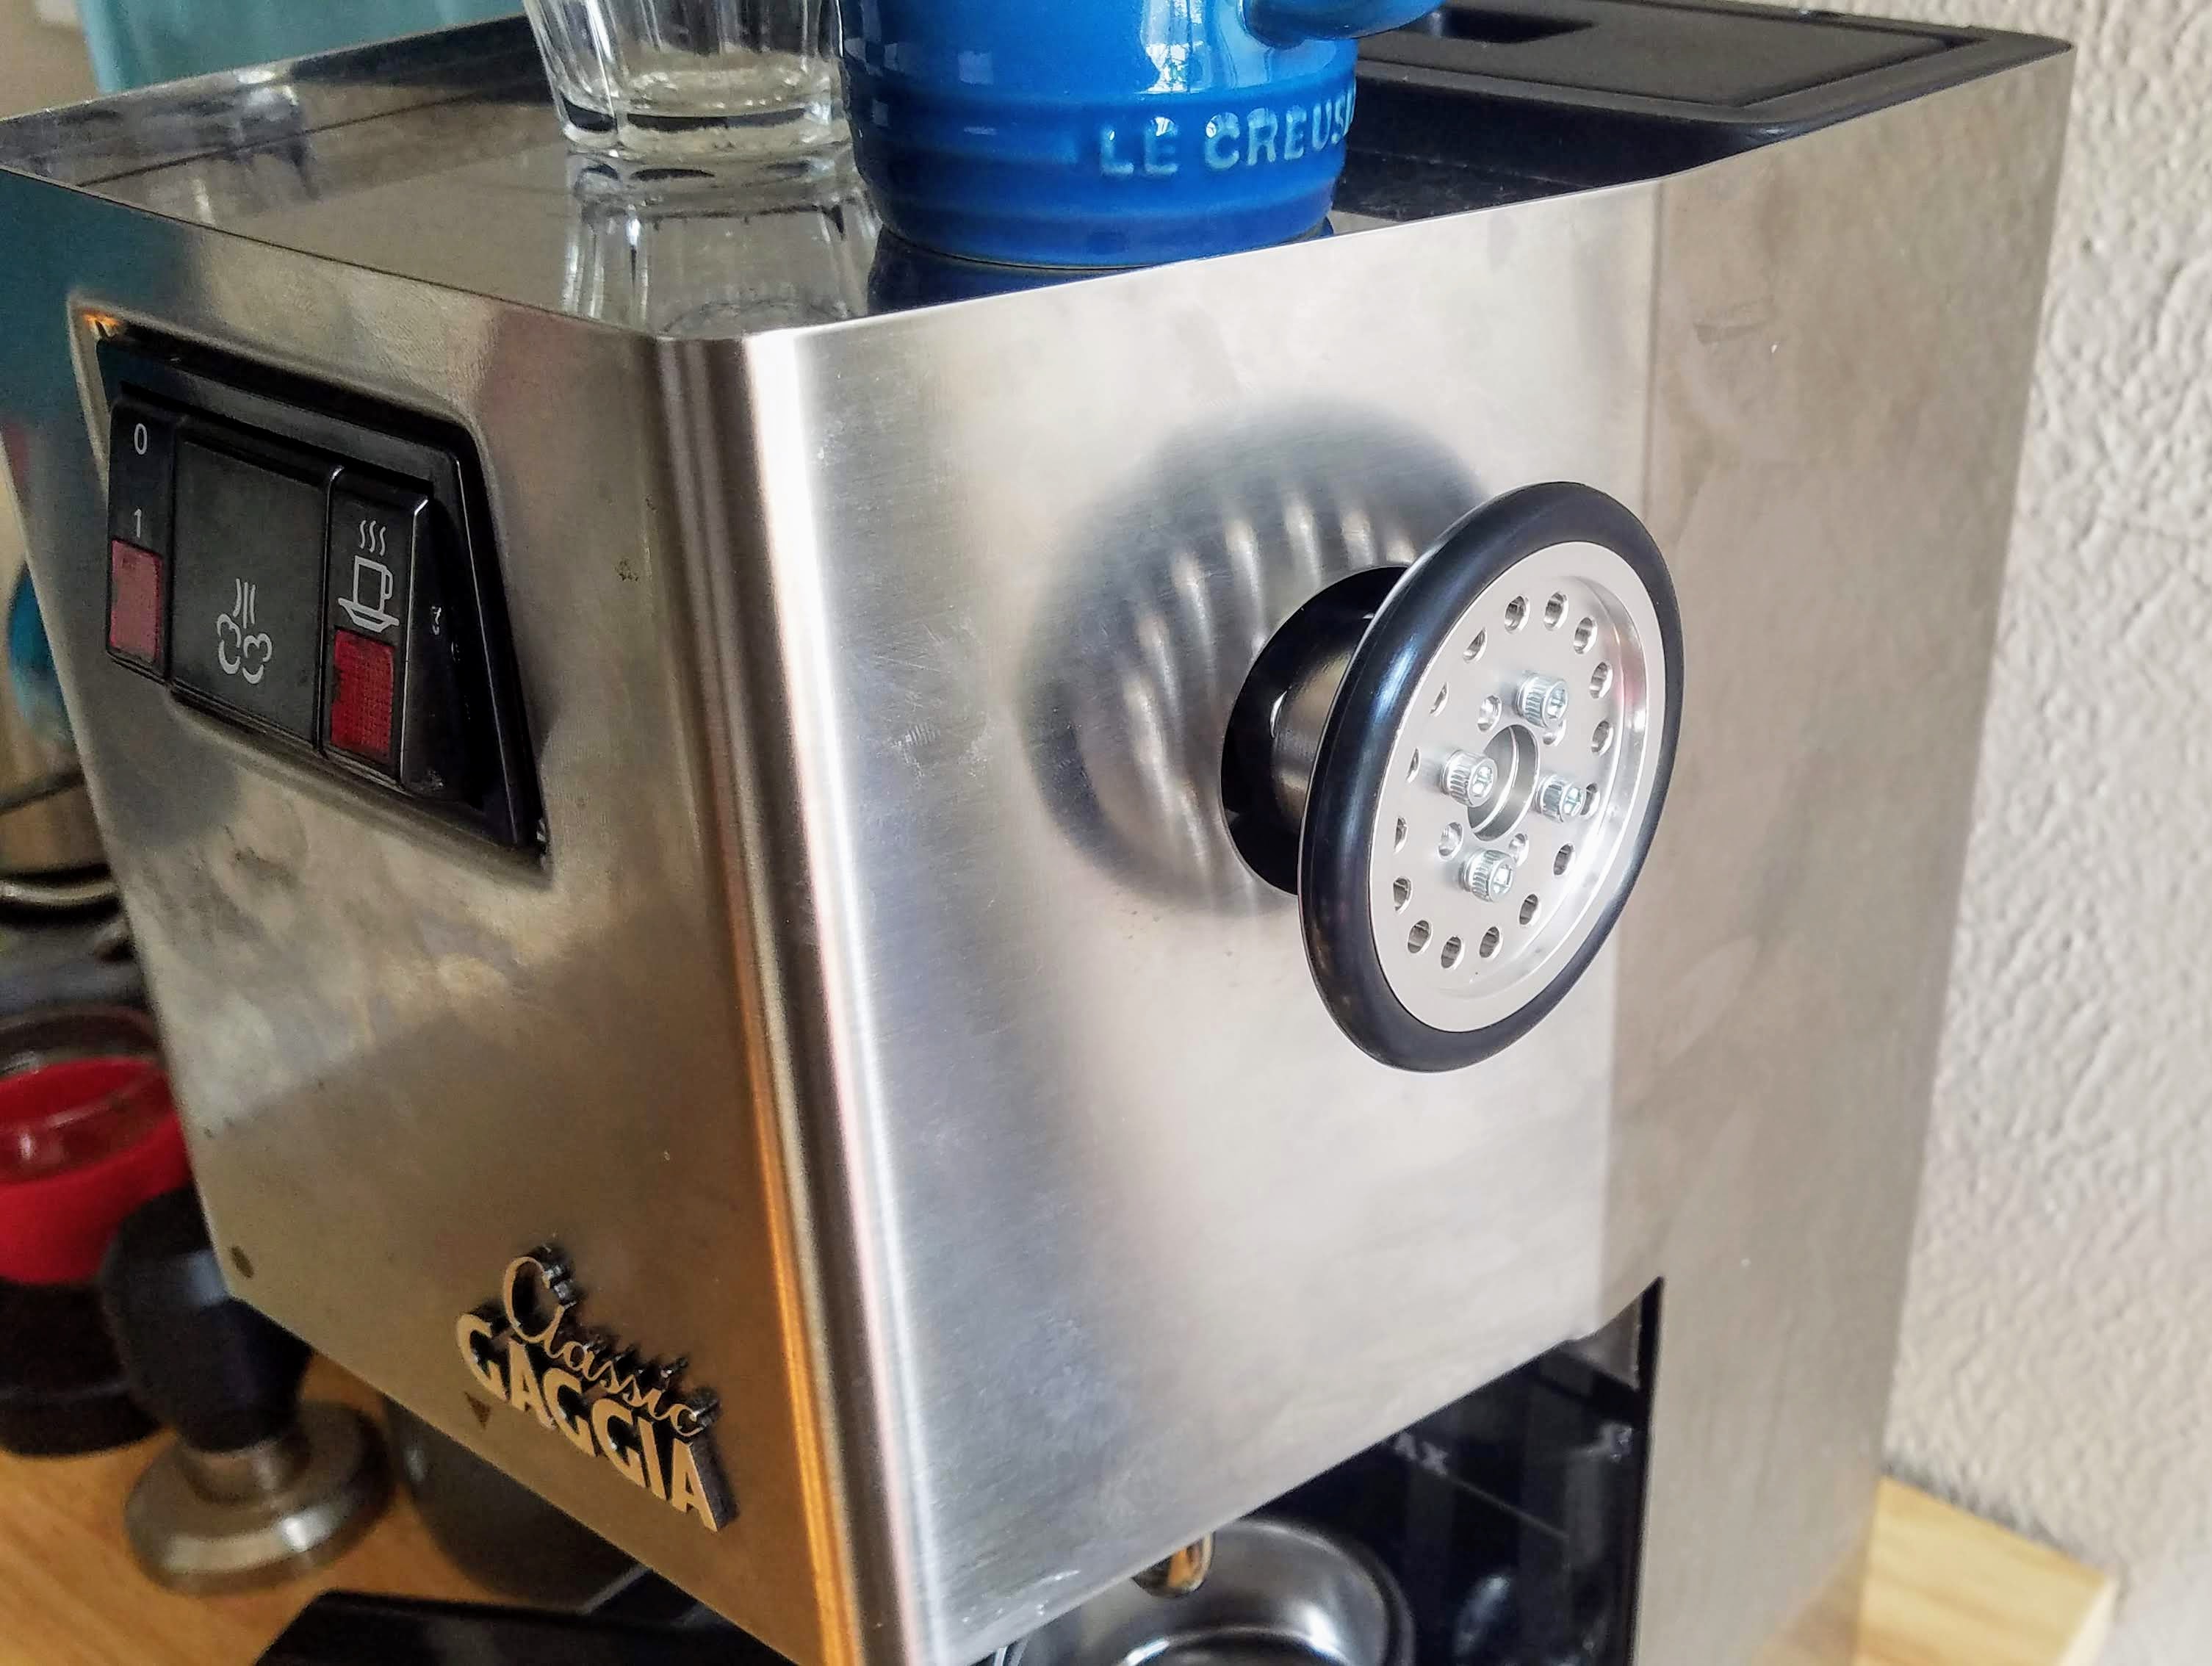
As it turns out, the robotics hobby world has some 6mm D-shafts on motors, and they have lots of parts that follow consistent standards (and cross-standard adapters), so I came up with a few different possibilities for prototyping a new knob. After settling on one, I crossed my fingers, and placed an order. Two days later, I received the parts and spent a few minutes putting them together. Thankfully, the final product turned out as way better than I could have hoped for a prototype:
Want to build one yourself? Read on:
Tools and Parts List:
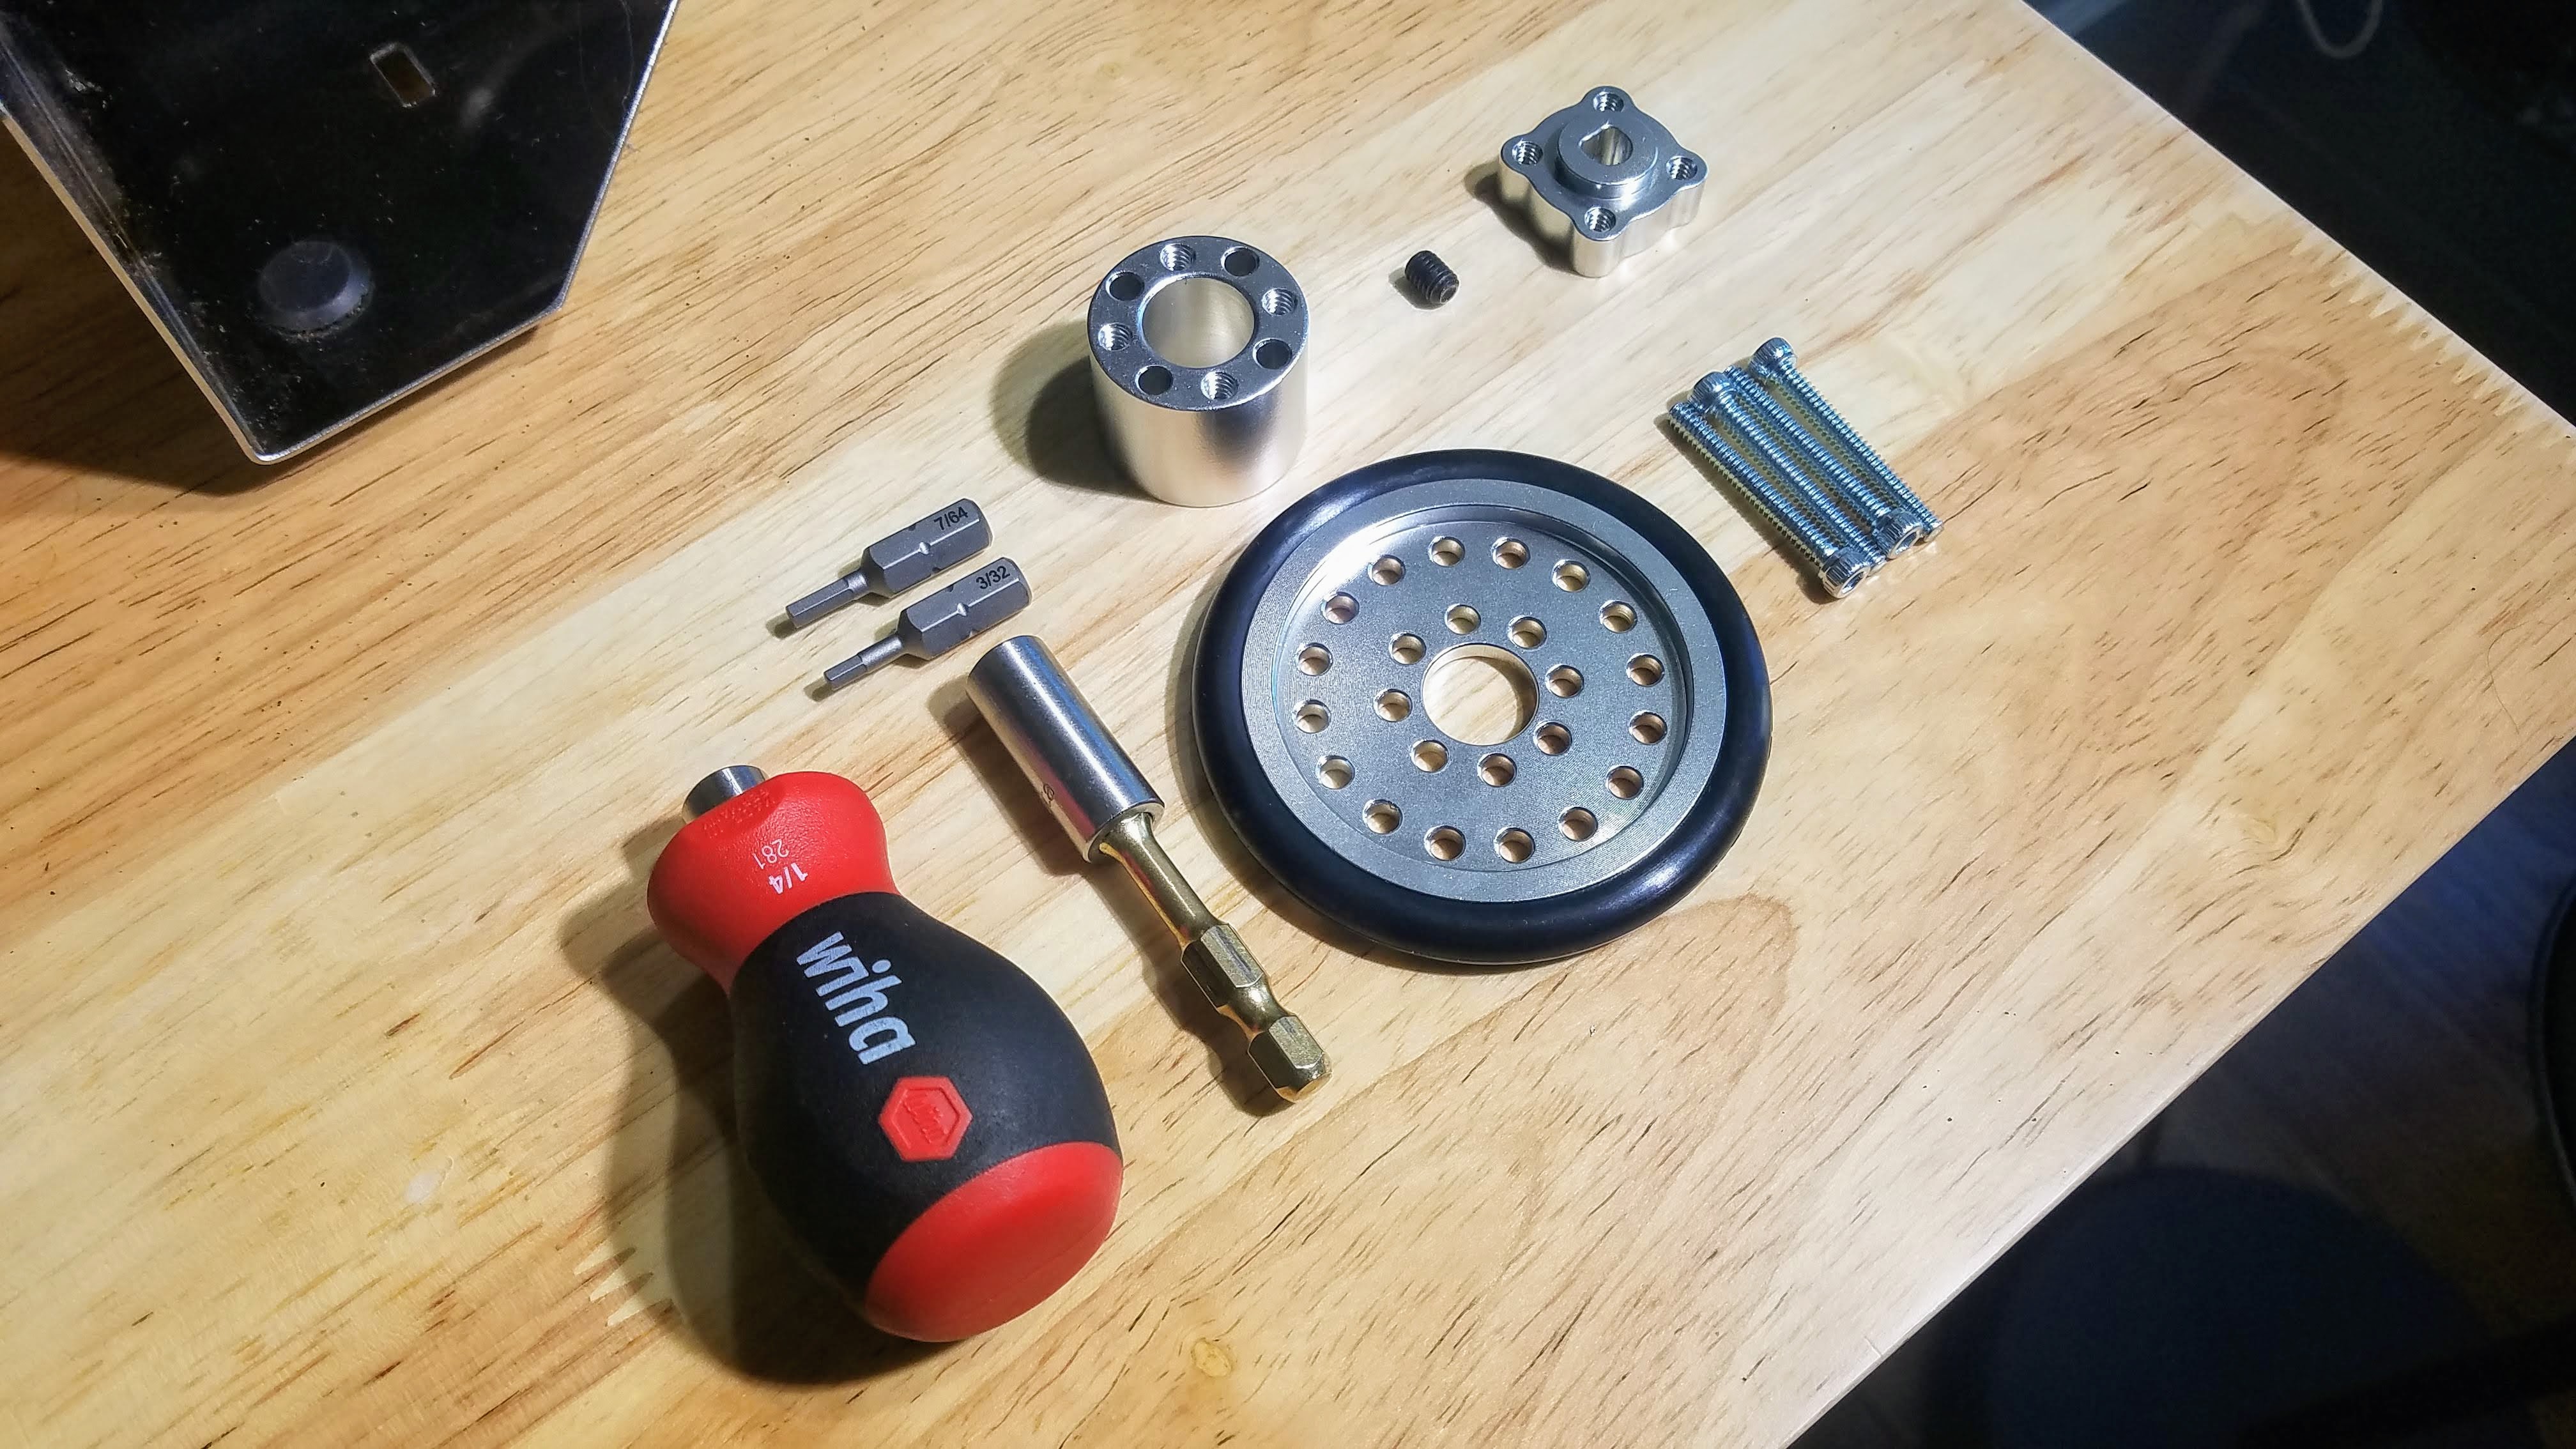
I ended up buying all of the parts from ServoCity. I have no affiliation with them - I didn’t even know they existed a week ago - but they seemed to be a reliable place to order from and they had everything I needed - most importantly, hardware designed to join a 6mm D-shaft. This parts list cost approximately $30 including shipping to Seattle:
- 6mm Bore Set Screw D-Hub (Tapped), 0.770” Pattern
- 0.750” Hub Spacer
- 6-32 x 1.125” (1-1/8) Zinc-Plated Socket Head Machine Screw
- 2.00 OD 0.500” ID Smooth Hub Pulley
- 2.00” x 1/4” O-Ring Belt
You’ll also need:
- screwdriver for interchangeable bits
- a #2 Phillips head bit (not pictured above)
- a 7/64” hex bit
- a 3/32” hex bit
- an extender if you are using a stubby screwdriver like mine - makes accessing the set screw a bit easier
- optional, but could be helpful if you need to reposition the steam valve: a pair of pliers with a smooth surface to avoid damaging the brass steam valve surface. I like my Knipex 86 03 180 for these sorts of delicate tasks, but any old pliers should get the job done (not pictured above)
Instructions
The assembly is pretty self explanatory, but here’s a basic guide. As easy as it is to make this change, this mod might void any warranty you have, and you could inadvertently damage your Gaggia during installation, so proceed at your own risk:
- buy the parts
- unplug the gaggia from the wall outlet and make sure it has cooled to room temperature
- put the o-ring on the pulley
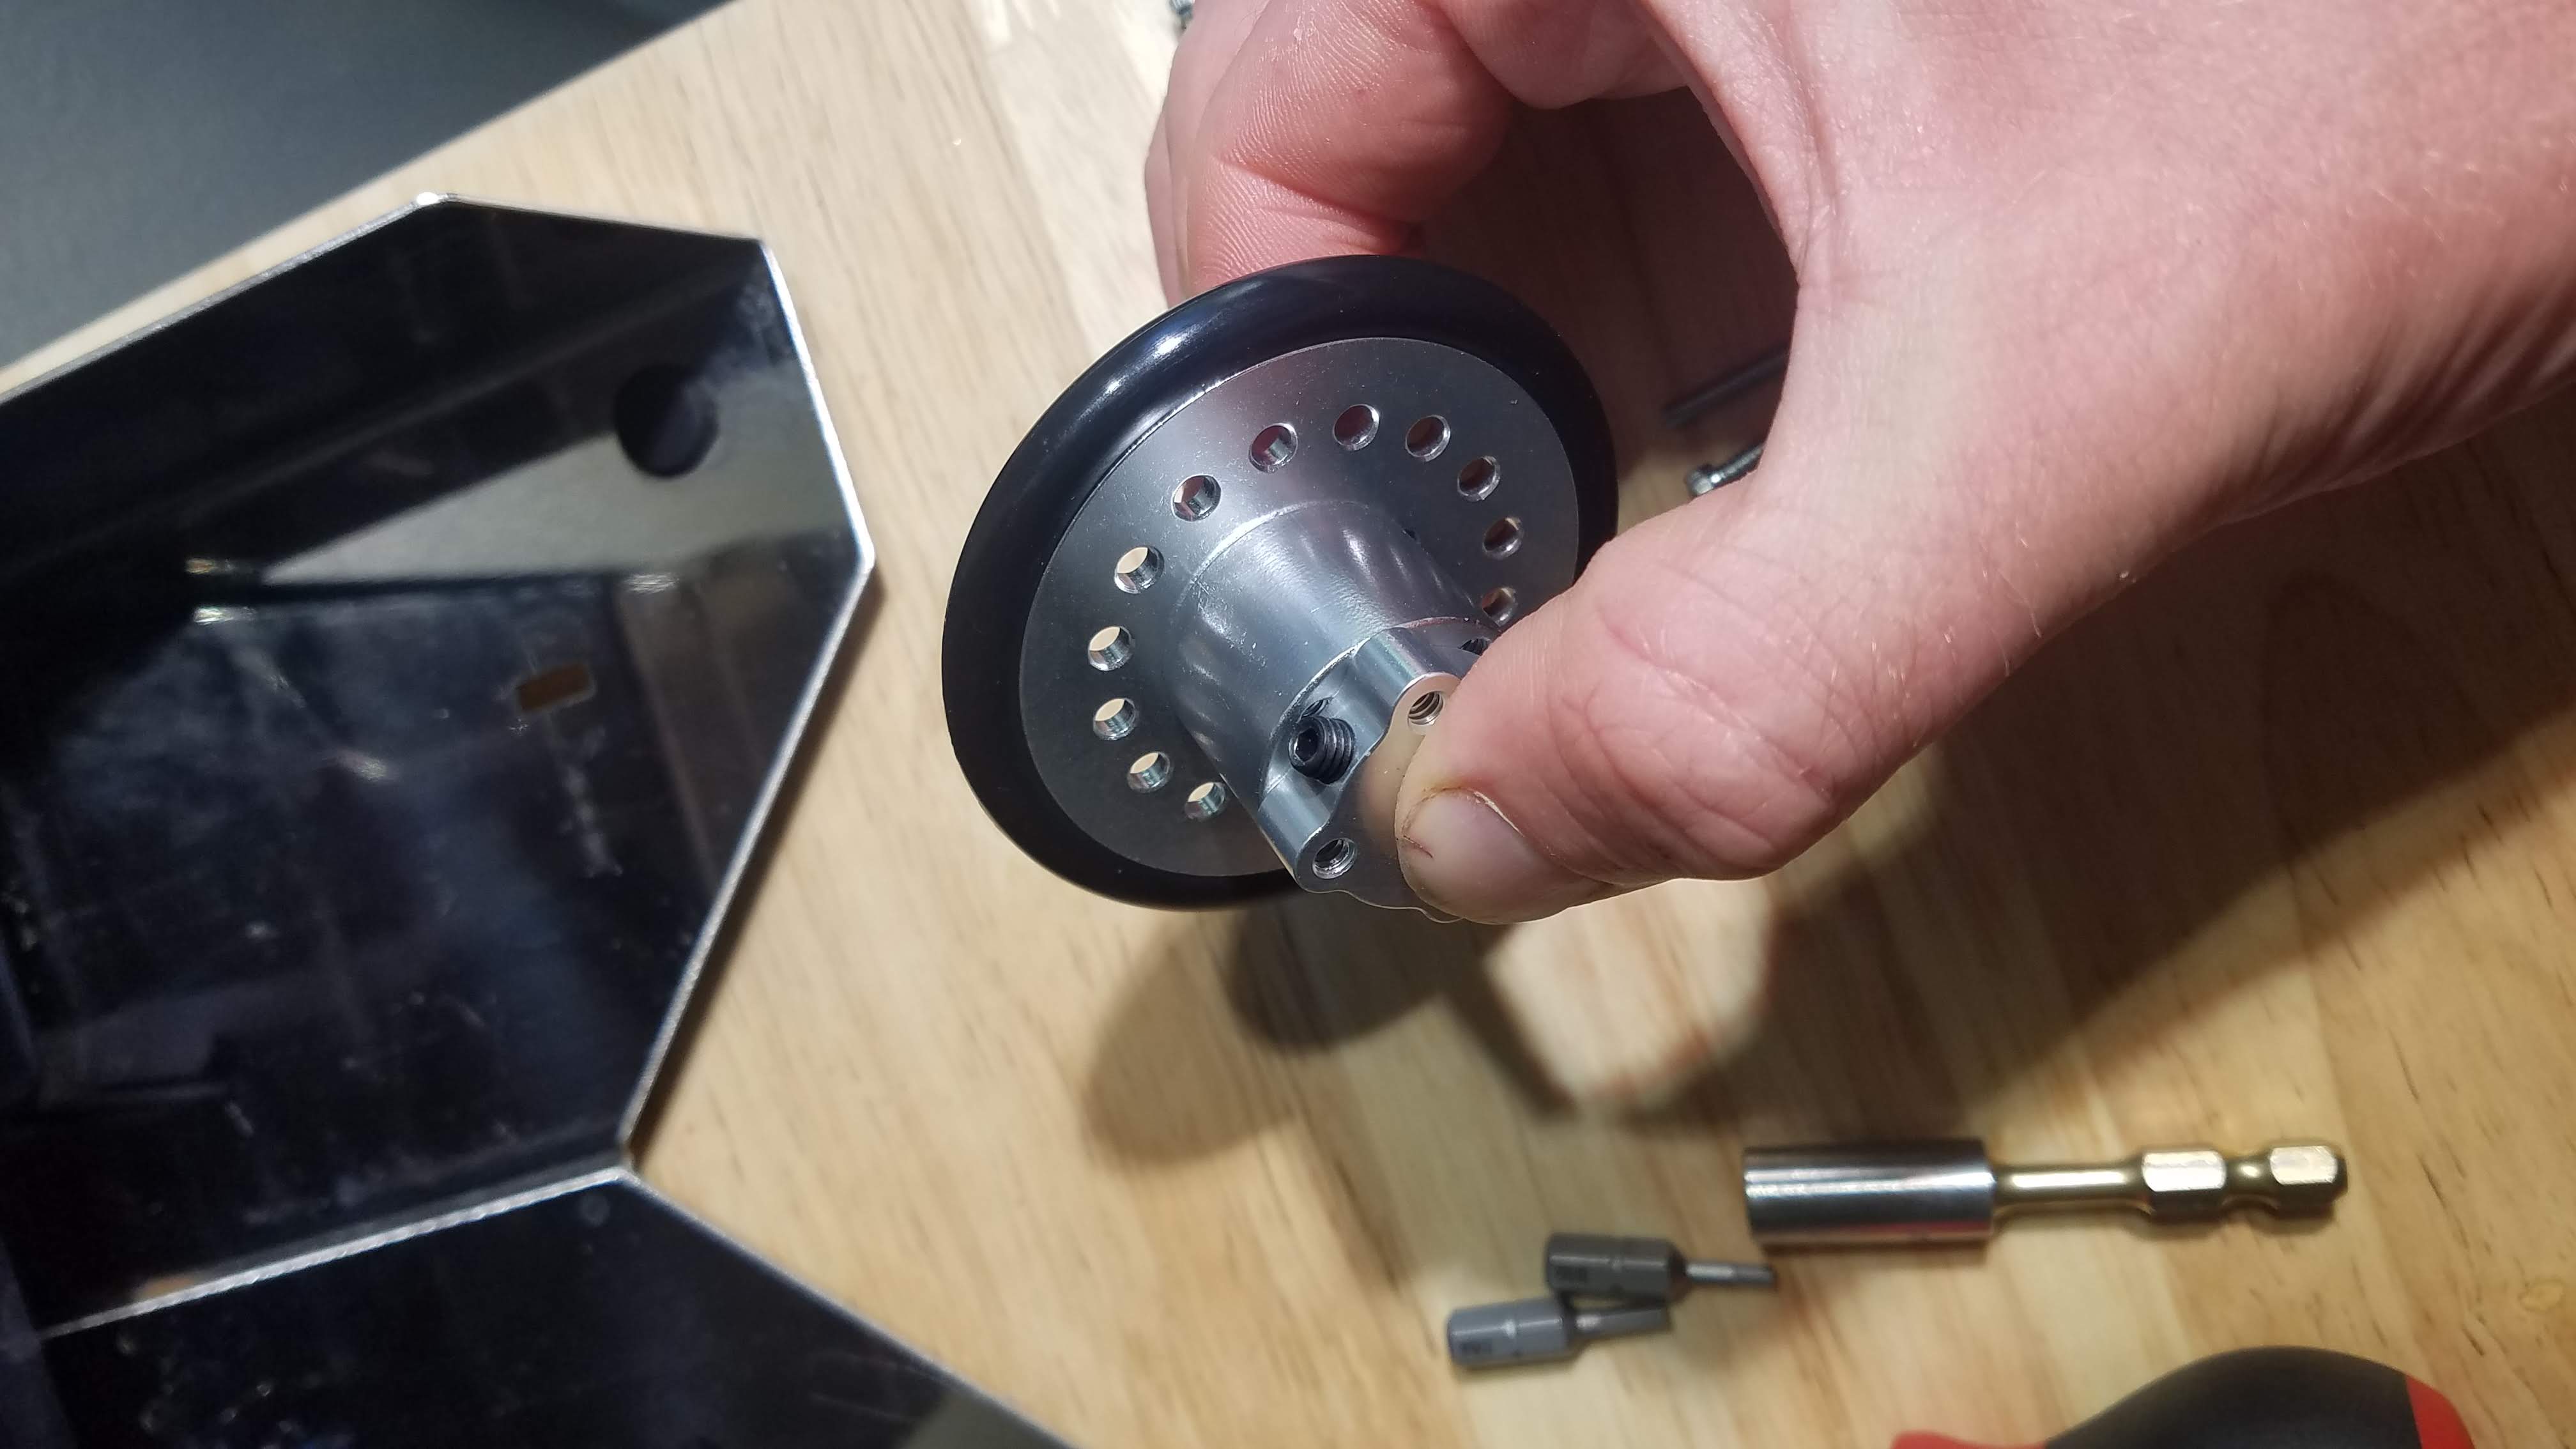
- insert the set screw into the small hole on the side hub, screw in enough to secure it but not enough to block the D-bore hole.
- assemble the parts as pictured: hub, spacer, pulley with o-ring. Make sure the hub screw holes, the 4 unthreaded hub spacer holes, and 4 of the center pulley holes line up:
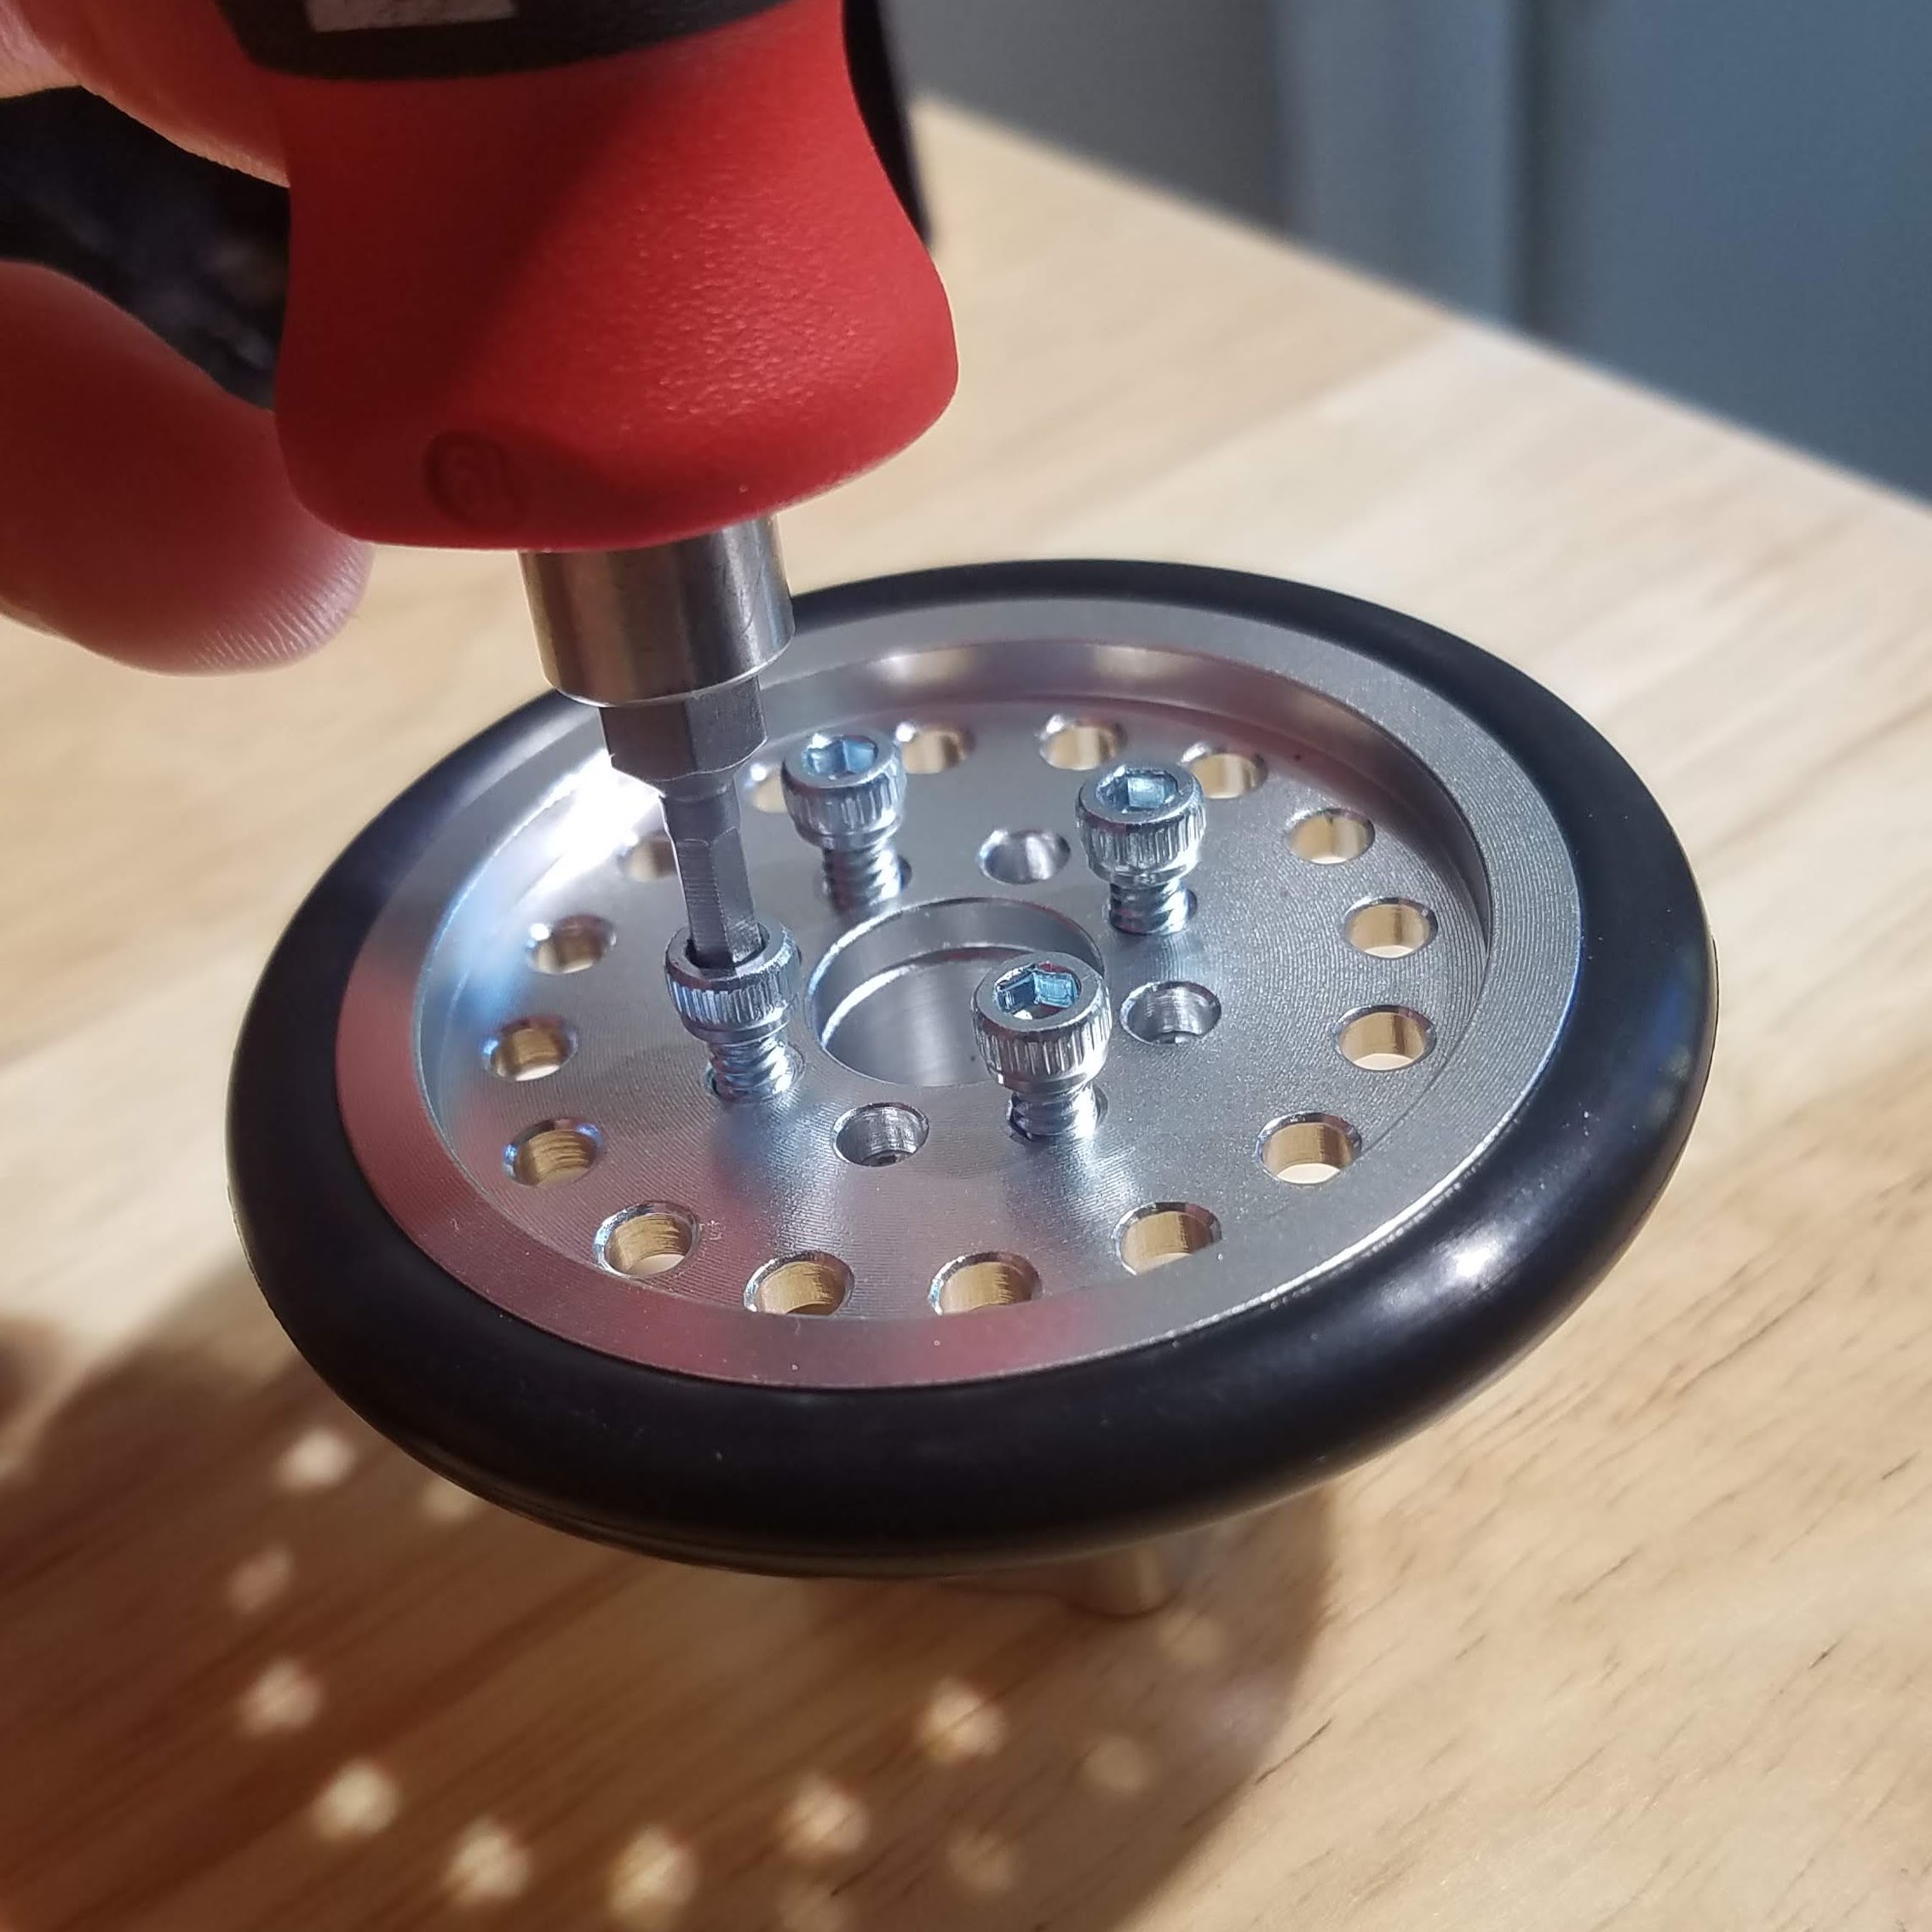
- push the screws through the 4 center holes that line up with the unthreaded holes on the hub spacer and threaded holes on the hub, and thread them into the hub. Tighten down with the 7/64” bit:
- unscrew the two screws in the back of the gaggia lid, remove the lid, and remove the old steam knob. The old steam knob should just pull off, but a flathead screwdriver can help remove it. Steps 2 and 3 of this IFixit tutorial describe how to remove the lid and steam knob with some nice pictures if you need a visual.
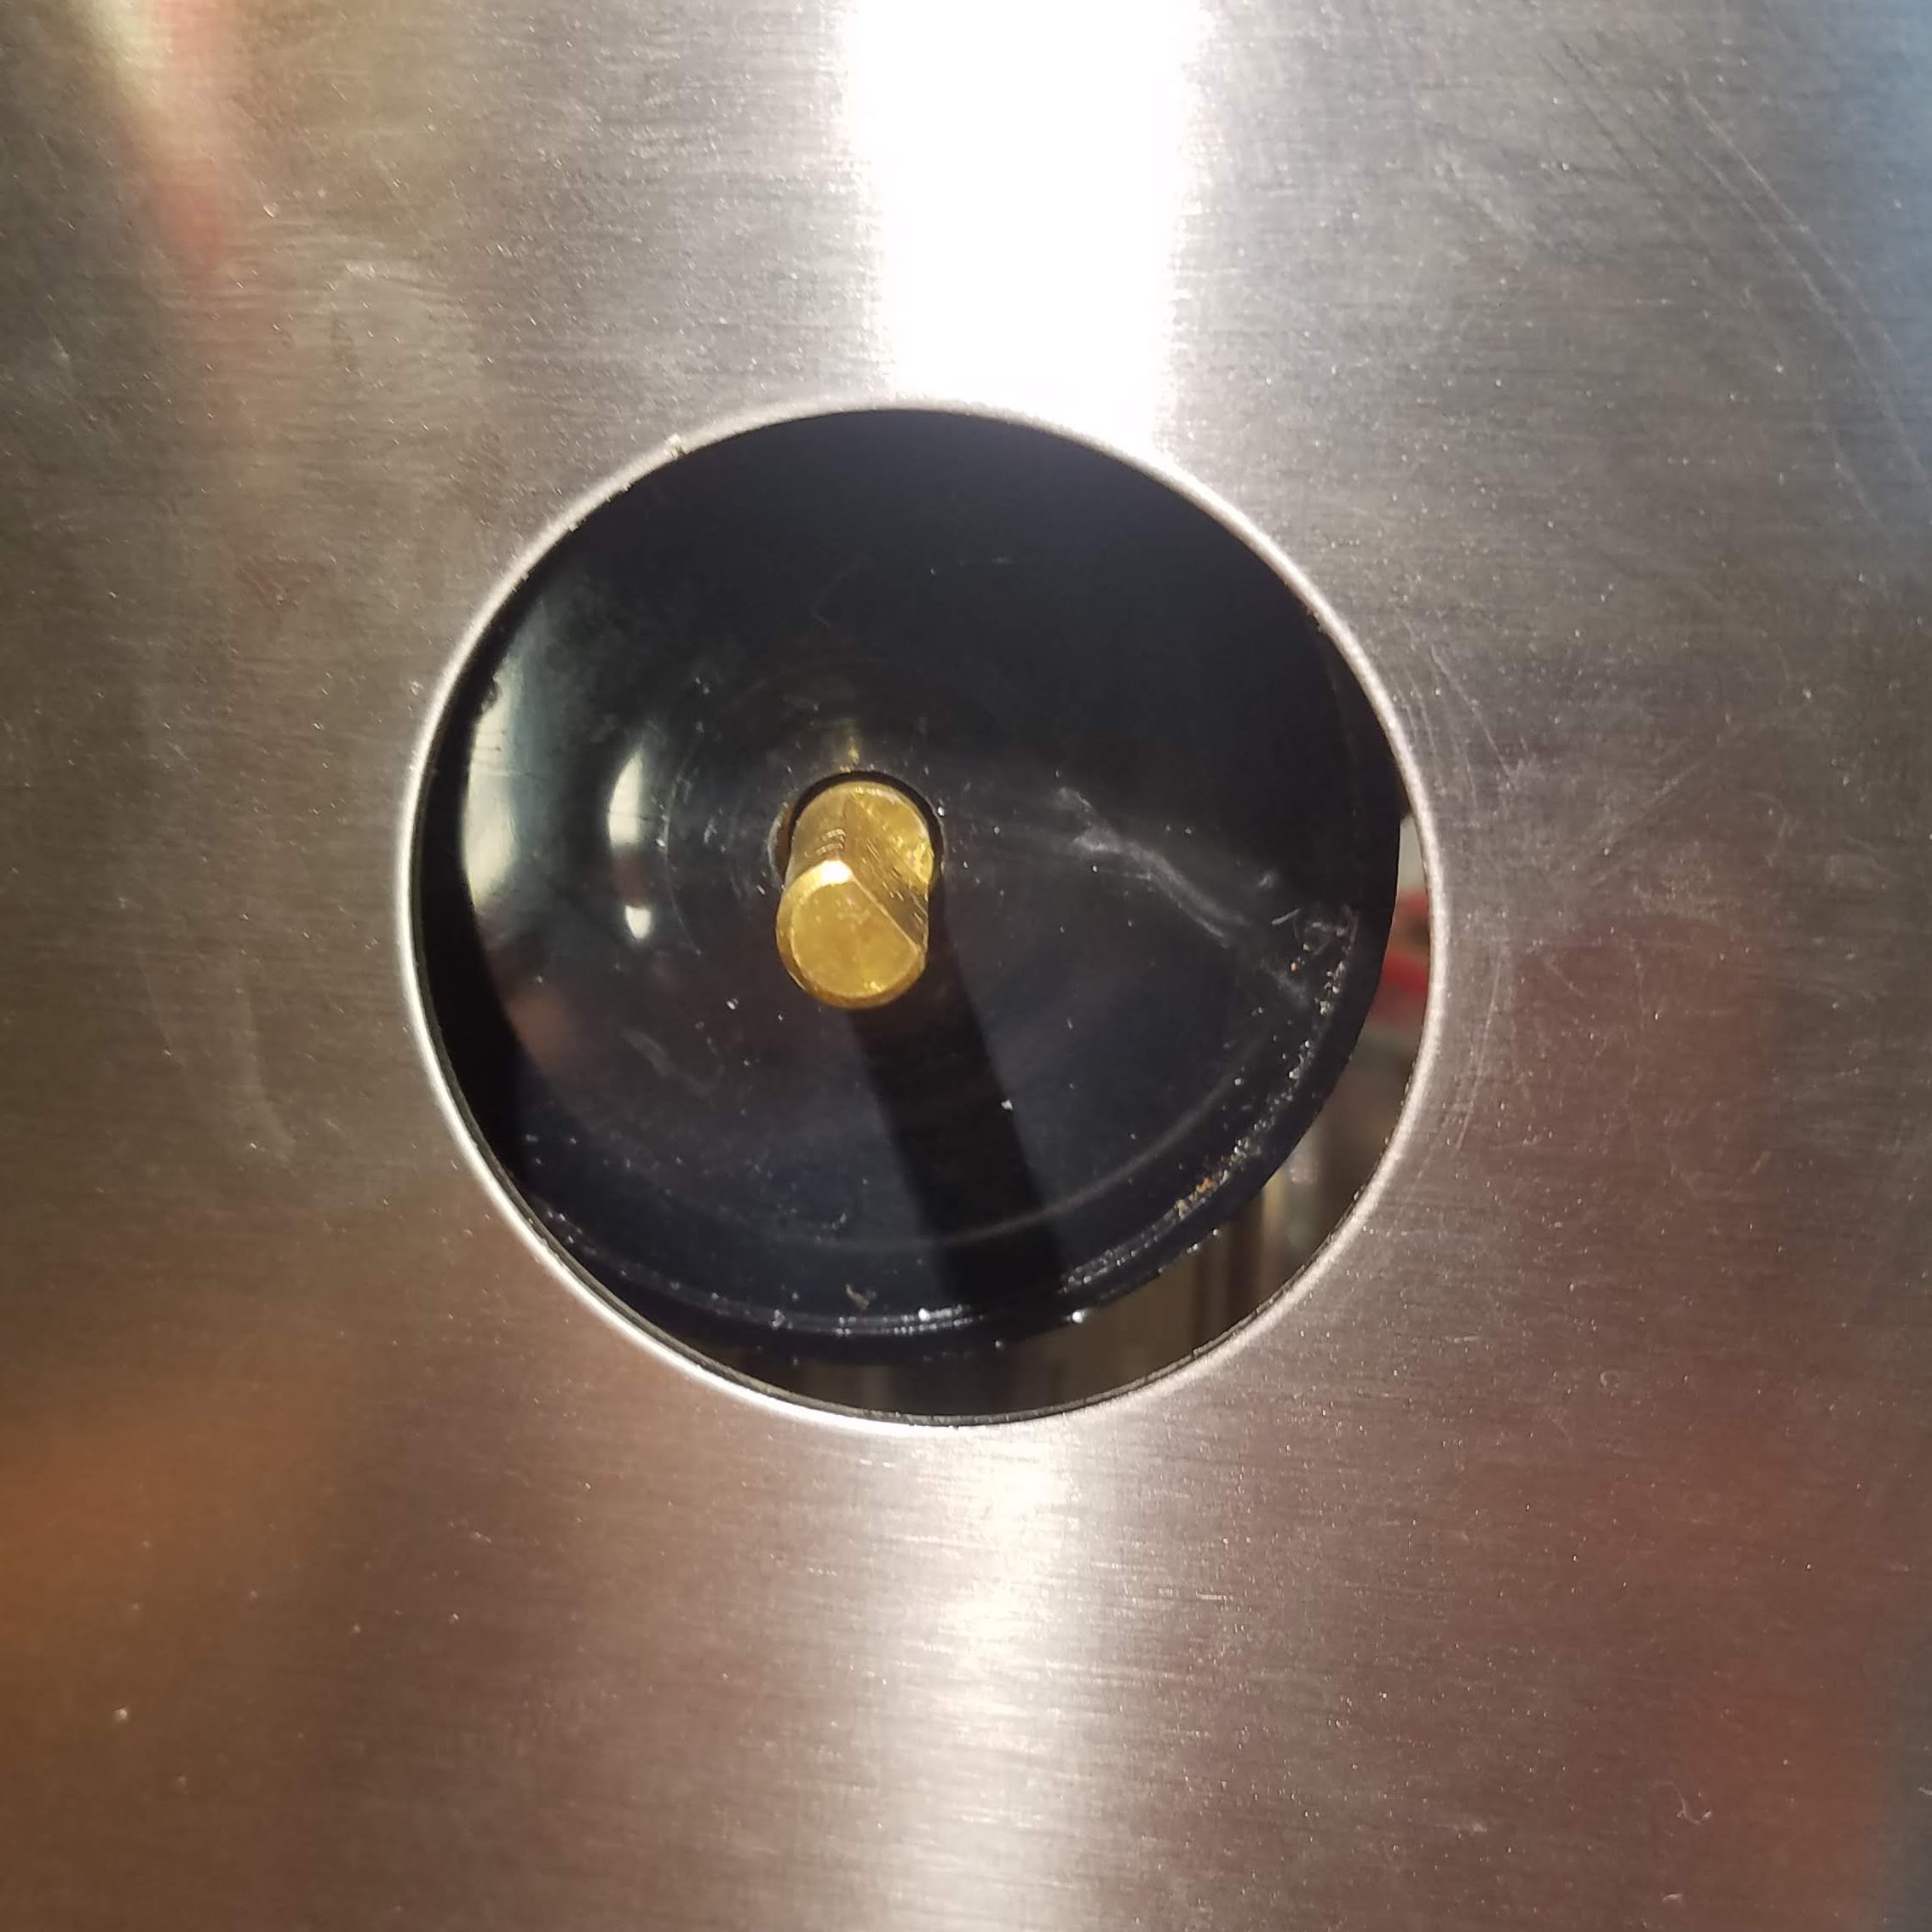
- inspect the brass steam valve shaft. Using the old steam knob partially slid onto the valve shaft or a pair of pliers, gently turn the valve shaft until the flat side of the valve shaft is facing the back of the machine, about 45 degrees from vertical:
- line up the flat side of the D-bore hub on your newly assembled knob with the flat side of the brass valve shaft, and slide the knob onto the shaft. Inside the machine, slide the hub down the shaft until you reach the end of the flat section of the shaft.
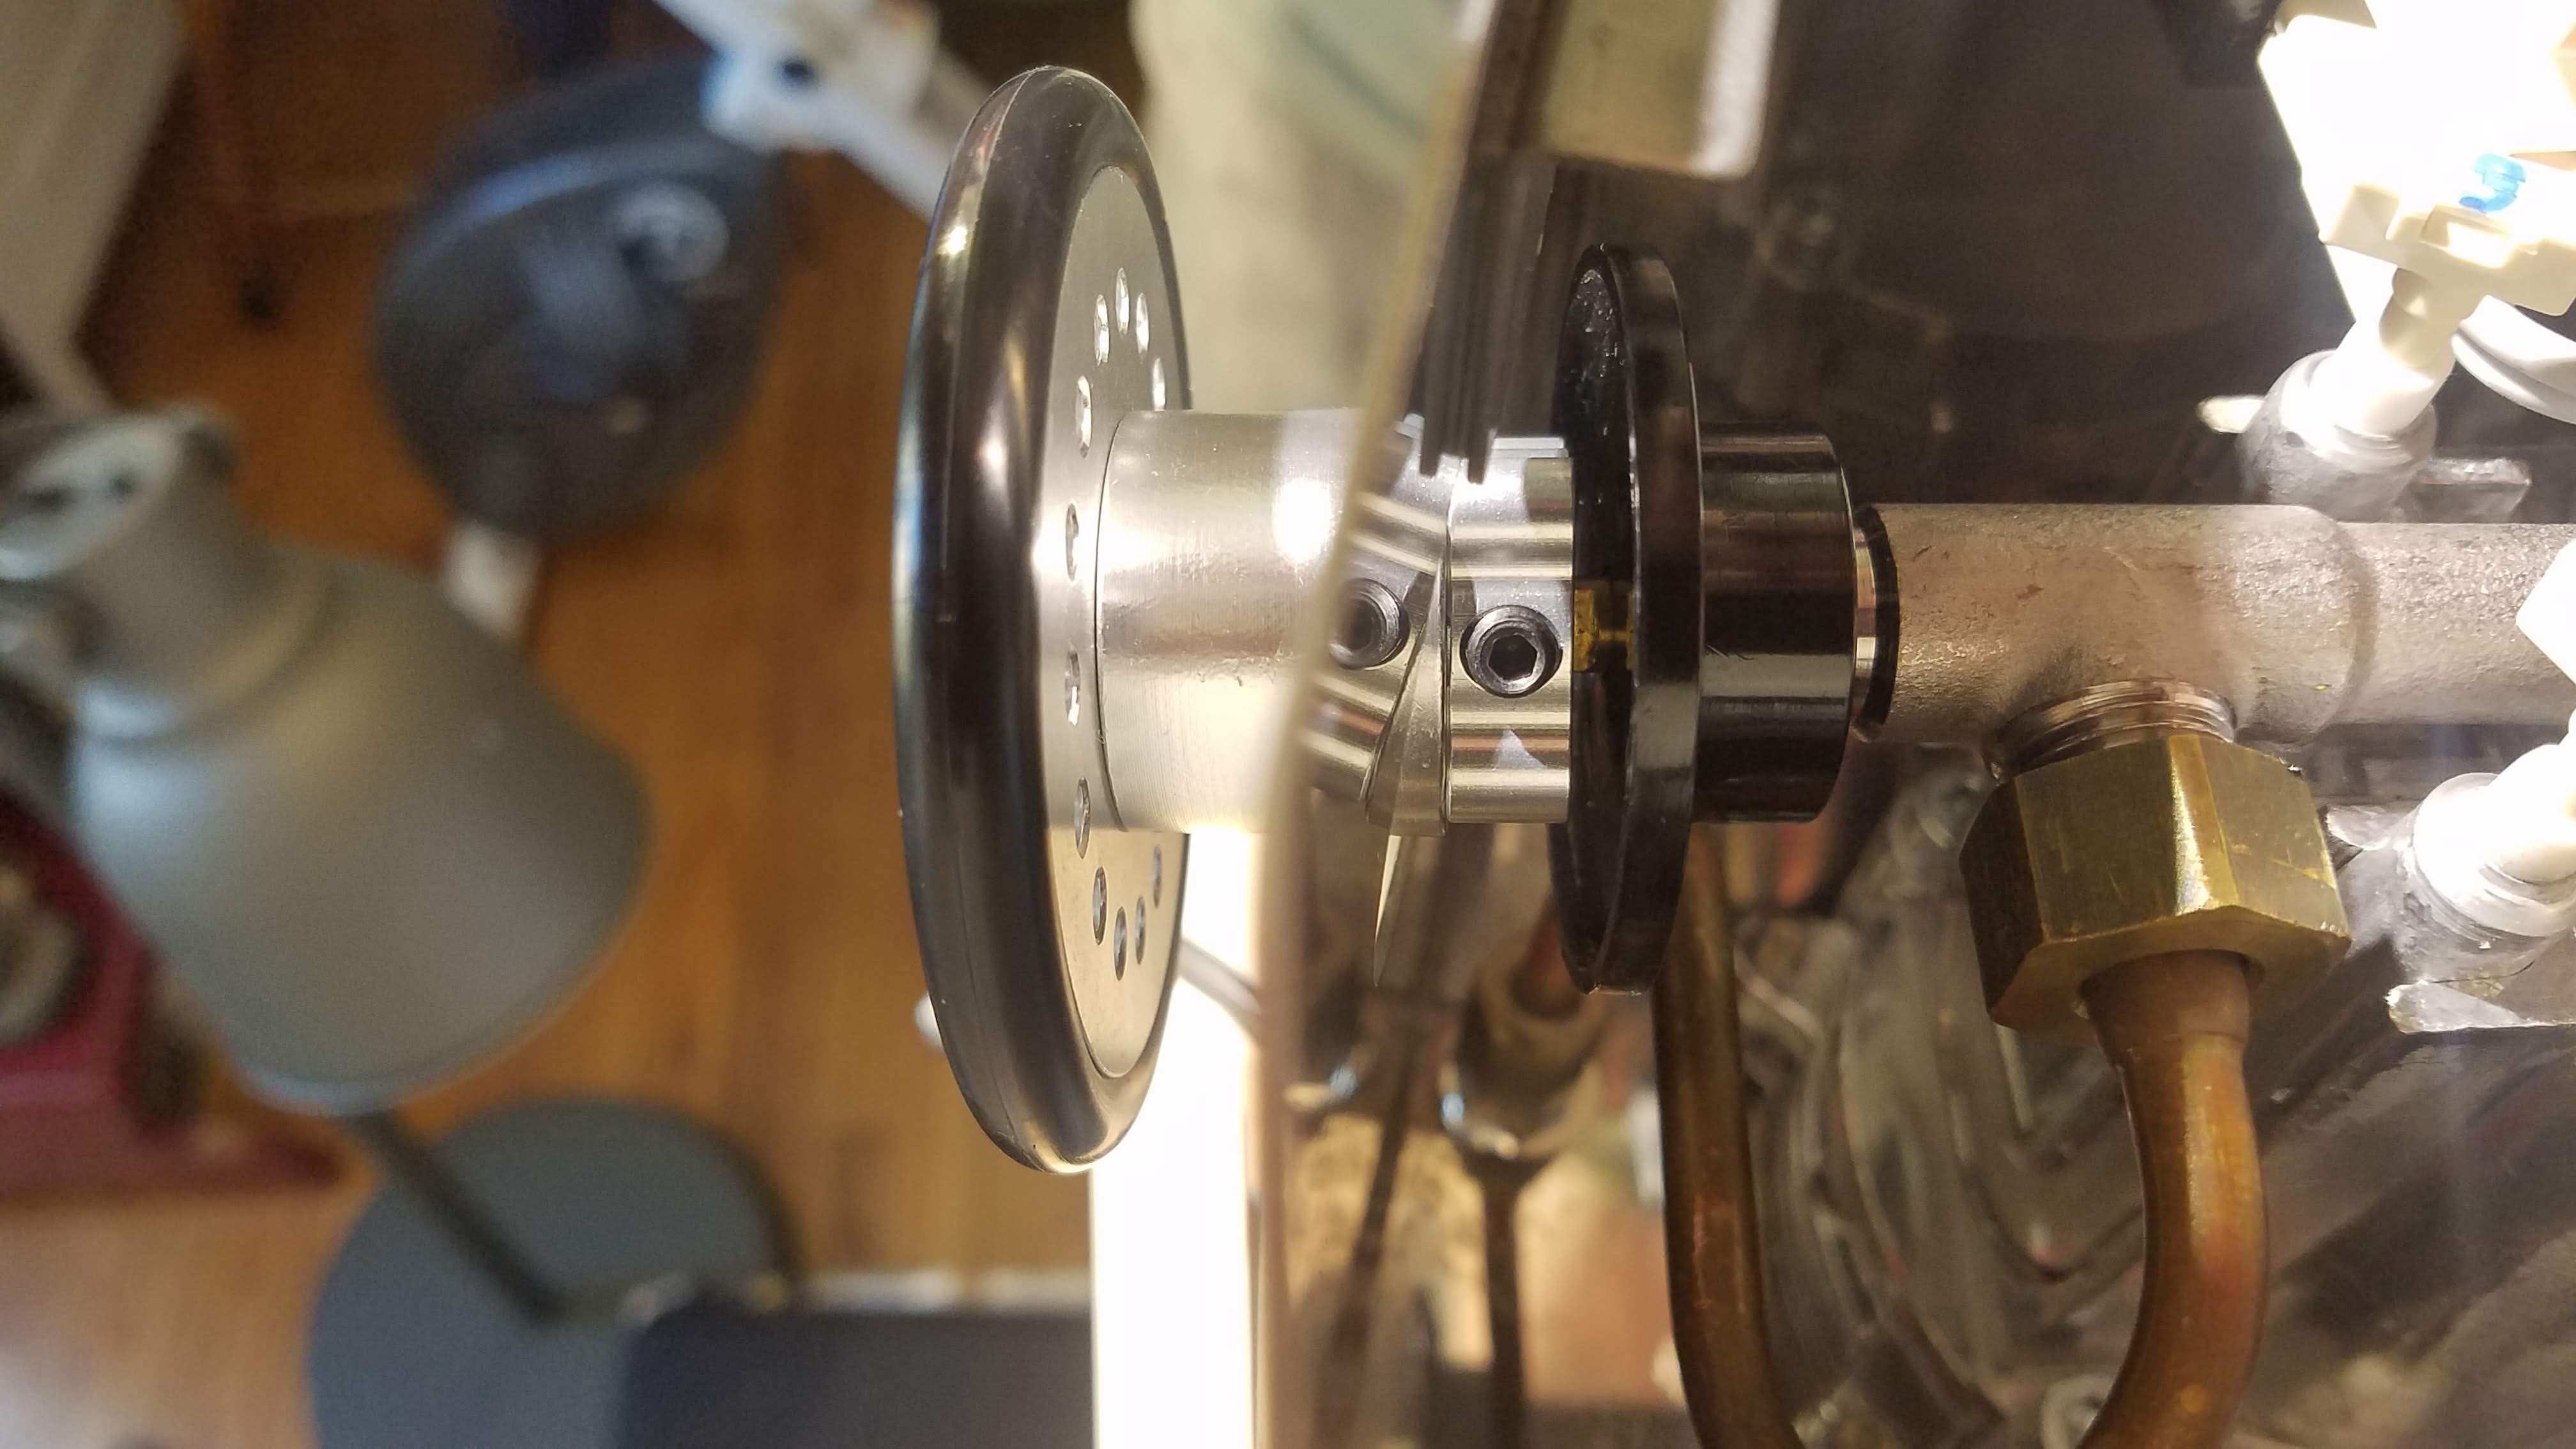
- tighten down the set screw in the hub with the 3/32” bit until the knob is firmly attached to the brass shaft. Be careful not to overtighten here - I think the set screw can probably bite into and mar the brass valve. Gently pull on the knob to make sure it’s firmly attached, and try turning the knob to see if you can move the valve.
- replace the lid and screw it back down.
You’re done!
Closing thoughts and future improvements
With this basic hardware (hub and spacer), I think one could easily mod this to use other knobby sorts of things. I have a few things I’d like to improve in a new iteration:
- better thermal insulation. This is the one thing the Gaggia knob does better. I thought that the large, airy metal pieces would disperse heat rapidly enough for it to remain cool to the touch, but in reality the metal bits get quite warm especially on a machine that’s been on for a while. The rubber o-ring gets warm too - not too hot to touch - but would prefer if it was cooler.
- grippier rubber. When the machine is hot, the o-ring can slide a little bit on the pulley. In practice, it’s not really noticeable, but still would prefer it didn’t happen at all. I am guessing this is a buna-n o-ring, and am planning on trying a silicone 2 inch I.D. o-ring to see if it works any better.
- custom parts. I’d like it if the hub was a mm or two thinner, and if the d-bore was a little snugger of a fit on the valve shaft. I’d also like the pulley to have the exact number of holes (4) that I need, and no more.
- metric-headed bolts. No reason for this other than personal preference. Pan-head bolds also might look a little cleaner.
I hope this was helpful! Please feel free to reach out on twitter with any questions.